Black Angel Costume Detail
This was a fun costume to make. My client designed it herself and it was left to me to figure out the construction details. I made the armor from cardboard and duct tape and followed an on-line tutorial on making fiberglass armor.
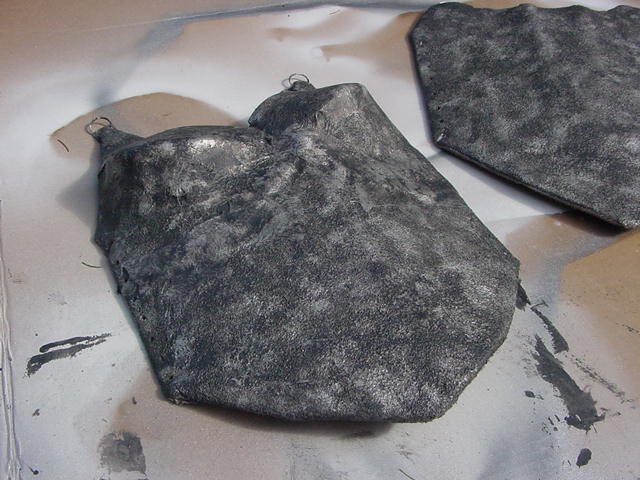
I cut the shapes from cardboard and used duct tape to seal the edges and to attach D-rings to the tops of the breast and back plate. I also incorporate a channel for the wings in the back plate at this point.
With assistance from Ricky from the ICG-D list, I proceeded to glue on a layer of felt with spray adhesive/craft glue. I reinforced the lacing holes with small washers. Turns out that wasn't necessary, and in fact, having the felt folded over to the inside caused more problems than I anticipated. Once that was dry, I laced the armor in such a way that it bent as if it were on a body, because after fiberglassing, I was afraid it would no longer fit if not prebent.
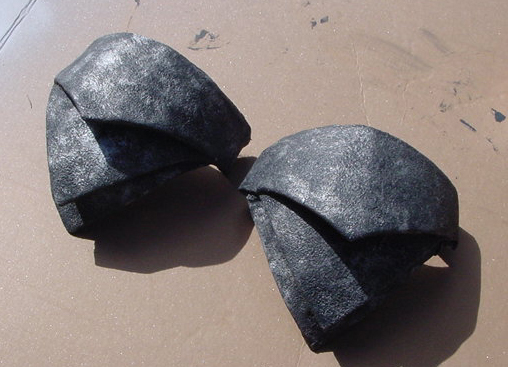
I put on a respirator mask, eye protection, gloves, long pants and long sleeve shirt and set up on a huge piece of cardboard outside. It was HOT and disgusting to have on all that stuff, but fiberglass is NASSTY stuff! I purchased the fiberglass resin and hardener at Napa Auto parts. You are supposed to mix 1/4 can with 1/4 tube of hardener. My first batch didn't get enough hardener, as it wasn't dry for 24 hours.... My second batch was better and dried in about 2 hours. The uncured stuff stinks and should be left outside or in a VERY WELL ventilated area.
I sanded all the pieces with 100Grit sandpaper and applied a second coat of fiberglass. This time, I used some of the fiberglass fabric that comes with the kit to blend some of the seams and reinforce the edges where it was to be laced together. Good idea. I would recommend using it over the felt next times, over the whole piece.
Be careful, but work quickly, 'cause the stuff does set up faster with the fiberglass fabric in the mix. Use cheap throw away paintbrushes and disposable mixing containers.
After
the pieces were dry and sanded as smooth as I could get them, I drilled holes
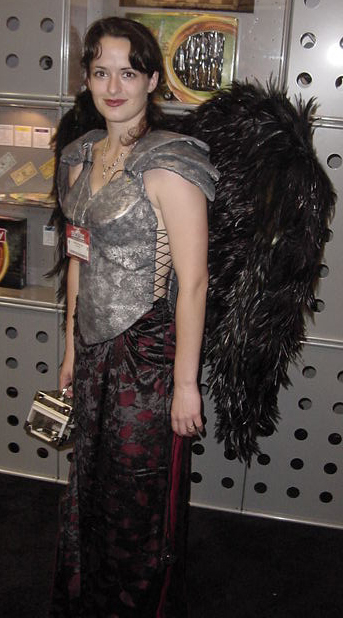
for the side lacing and used an Antique Pewter paint kit from Home Depot to get
the metallic look. I lined the
armor pieces with a soft velour so there would be as little skin irritation as
possible.
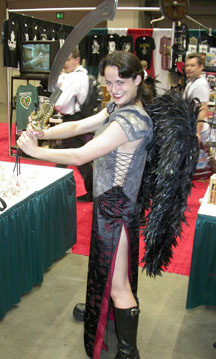
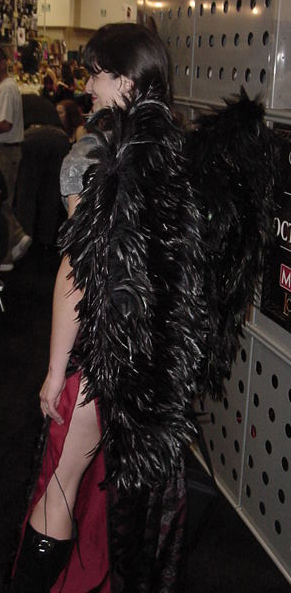
I used a 1960s straight skirt pattern for the skirt, a two-layered piece with sheer burnout velvet topping a lovely maroon polyester fabric.
 The
wings were made from pieces of plastic mesh (the large rolls you can get from
Home Depot) and strengthened with Ľ” metal dowels bent to the correct shape
and zip-tied on to the mesh. I coat the mesh with duct tape on both sides and hot glued
layers and layers and layers of black feathers.
The metal dowel was long enough on the inside edge to be inserted into a
slot in the backplate of the armor. The
wings moved slightly front and back as my client walked, making a really cool
effect. The whole costume came
apart in such a way that it could easily fit in a suitcase for travel to
conventions.
The
wings were made from pieces of plastic mesh (the large rolls you can get from
Home Depot) and strengthened with Ľ” metal dowels bent to the correct shape
and zip-tied on to the mesh. I coat the mesh with duct tape on both sides and hot glued
layers and layers and layers of black feathers.
The metal dowel was long enough on the inside edge to be inserted into a
slot in the backplate of the armor. The
wings moved slightly front and back as my client walked, making a really cool
effect. The whole costume came
apart in such a way that it could easily fit in a suitcase for travel to
conventions.
![]() Back to Black Angel Costume Main Page
Back to Black Angel Costume Main Page