Grima Wormtongue Costume Detail
Making the Grima costume was a lot of fun. I
saw it at FIDM in LA in March and decided that I must make this outfit. It is
incredibly beautiful in person. I started with a REALLY basic pattern I dug from
my stash for a Passion Play or something, and made a simple long sleeved robe in
a mustard/gold lightweight satin, with the darker, matte side as the right side.
 I made a second, sleeveless robe from the same
pattern in a delicate floral burnout velvet material. Sleeves for the burnout
velvet layer were cut from black chiffon, and a layer of lace-like ovals was
glued to each sleeve. I found the trim for a ridiculous price in LA and bought
an entire bolt of it. I had to trim off the "fancy" parts to just
leave simple ovals. When the glue dried, I sewed up the sleeves and attached
them to the outer layer. The cuffs are layers of black lace and a hideous black
and gold metallic second hand skirt material.
I made a second, sleeveless robe from the same
pattern in a delicate floral burnout velvet material. Sleeves for the burnout
velvet layer were cut from black chiffon, and a layer of lace-like ovals was
glued to each sleeve. I found the trim for a ridiculous price in LA and bought
an entire bolt of it. I had to trim off the "fancy" parts to just
leave simple ovals. When the glue dried, I sewed up the sleeves and attached
them to the outer layer. The cuffs are layers of black lace and a hideous black
and gold metallic second hand skirt material.
I did something similar to the yoke area: I
sewed a sheer layer of chiffon to both layers of the robe, and trimmed away the
velvet burnout underneath. I then glued on more of the lace ovals, and then
trimmed top and bottom with black "gimp" type trim.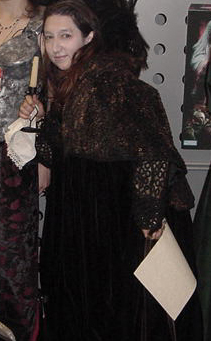
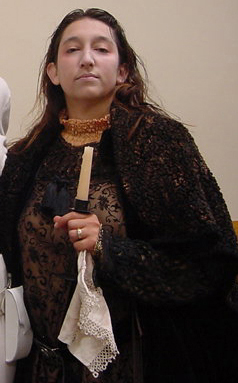
The smocked neck was made from a rectangle of the gold fabric. I stitched several rows (6 or 8, I think) about 0.5 inches apart, the long way of the rectangle. I put elastic thread in the bobbin, to naturally pull up the "smocking". I then attached this scrunched up piece of material to the neckline of the robe.
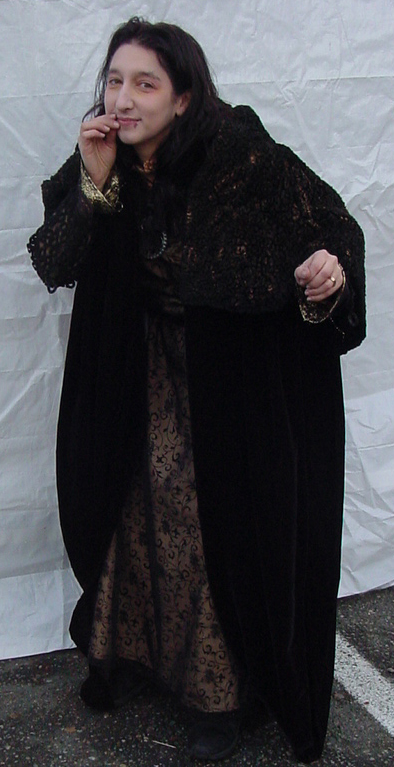
The overrobe was more complicated to design than to actually sew. It is in 3 layers. The first layer is the same simple robe, made in acetate velvet, split up the front, with greatly expand armhole areas. I added a "fishtail" gore to the center back to increase the fullness and give it a bit of flare in the back. One of the costume descriptions mentioned this aspect. The second layer is two long lengths of the same velvet, about 2 - 3 yards each, fully 45" wide. They were folded in half lengthwise, wrong sides together. I sewed them together along about 15" of the long edge. This double wide piece hung from the back of my shoulders, gathered along the short edge to fit the width of my shoulders. The two long pieces draped down under my arms and the ends were similarly gathered to attach at the shoulders. Over all this, was a strange wooly/felty cape type thing that I found at Value Village. I attached tassels at chest height to prevent the whole thing from sliding off.
I would like to someday spend considerable time with a very fine paintbrush and add the subtle designs in bronze and silver/grey that are on the actual velvet of the heavy overcloak. To see it up close is just stunning.
 I painted the cape and the robe yoke with
bronze fabric paint and applied a lot of dirt everywhere. The paint didn't
sit down into the folds of the wooly cape as well as I wanted, but it looks OK.
I painted the cape and the robe yoke with
bronze fabric paint and applied a lot of dirt everywhere. The paint didn't
sit down into the folds of the wooly cape as well as I wanted, but it looks OK.
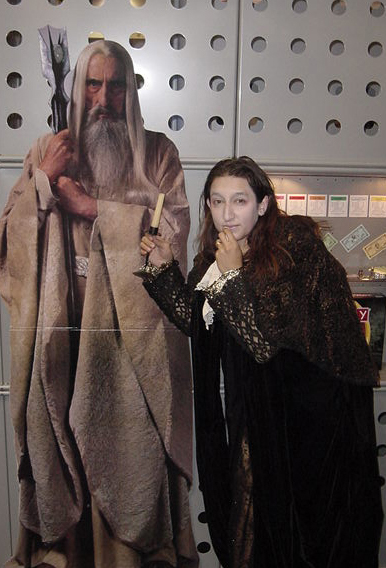
I completed the costume with a scrap of
dirtied antique pillowcase, a burned down candle, a medallion made from a
curtain tie back piece, and metal candlestick. 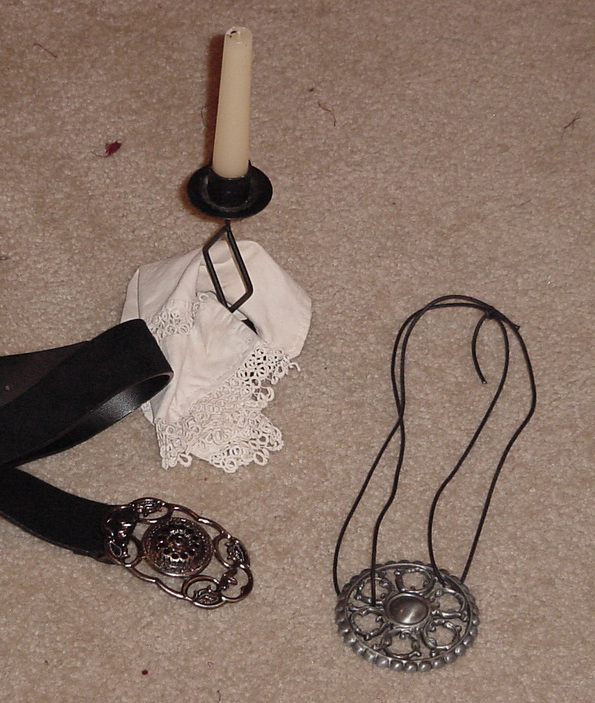 I applied white makeup, with
pinks and yellows around the eyes, pale green veins, as well as greys and browns
to simulate a bit of 5 o-clock shadow. The effect would have been better if I
had thought to do my hands as well -- or waited until winter when I'd lost my
tan!! The photographs don't really do the makeup justice... Oh well.
I applied white makeup, with
pinks and yellows around the eyes, pale green veins, as well as greys and browns
to simulate a bit of 5 o-clock shadow. The effect would have been better if I
had thought to do my hands as well -- or waited until winter when I'd lost my
tan!! The photographs don't really do the makeup justice... Oh well.
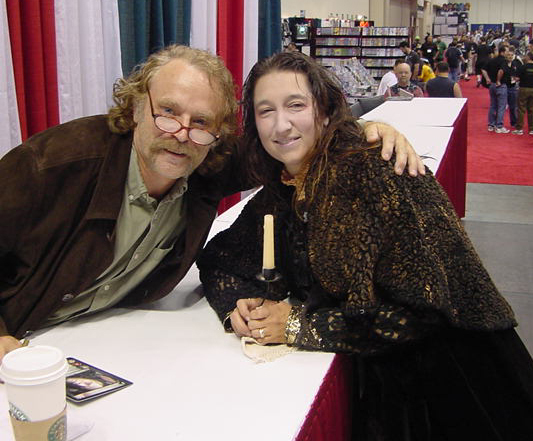
The highlight of wearing it was meeting Brad Dourif himself and having him commiserate on hot it was to wear it and how many times he tripped over the flapping robe bits!!
![]() Back to Grima Costume Main Page
Back to Grima Costume Main Page