Princess Leia Costume Detail
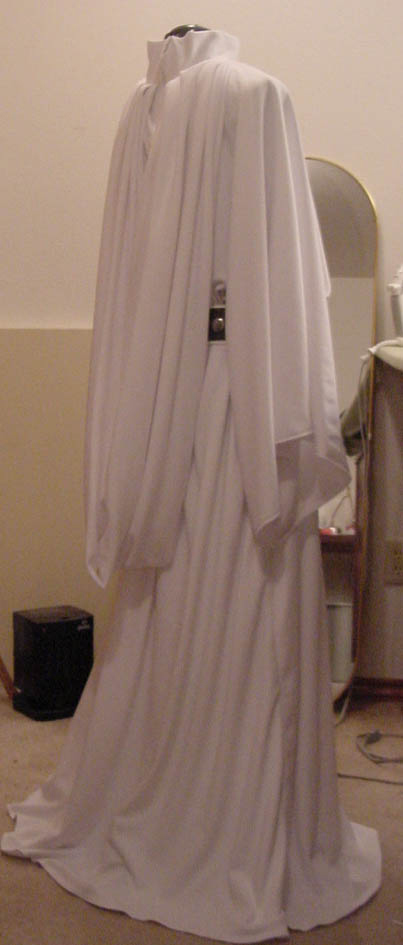
After studying several high-resolution pictures of this outfit, I realized there were no shoulder seams or set in sleeves. It basically was a drapey ōTö shape of material, folded at the shoulders, with a hole for the neck, and a hood. Further research revealed there was a zipper in the back, which I hadnÆt planned for, but easily incorporated.
I purchased a medium weight 2-way stretch white polyester from JoAnn Fabrics, over 60ö wide, enough to double up the fabric to avoid any see-through issues. It came out to be about 8 yards. After prewashing, I cut off a yard or so to make the hood, then folded the remaining 7 yards in half. I slit along the fold line, giving me two 3.5 yard pieces. I stacked those together to treat them as one and folded them again to create a two-layer rectangle the width of the fabric and about 60 inches long (almost a square in this case!). This first fold created the shoulder fold. Finally, this æalmost a squareÆ shape got folded in half so the selvage edges were together and the vertical fold was located at center front/center back.
I measured from the center of the spine to the wrist, added a couple inches for hemming the sleeve and marked that distance along the shoulder fold. Depending on the width of your fabric, this distance may be just to the selvage edge. From that point, I measured down 20ö from the shoulder fold to mark the bottom of the sleeve opening. I took bust, waist, and hip measurements and added 12ö to the widest of these three numbers to make sure the dress would be nice and drapey. I measured out from the central vertical fold ╝ of that distance and marked that point all down the length of the fabric to create the cutting line for the side seams. I measured down 16ö from the shoulder fold at the side seam mark and connected that point with the bottom of the sleeve opening. Now I had half of a modified ōTö shape. I cut along the marking lines through all layers of fabric. I cut a small quarter circle from the corner where the shoulder fold and center fold met to create the neck hole. Cut a hole MUCH smaller than your neck circumference to start!!
Before the layers could shift at all, I stitched up the side seams, starting at the wrist edge of the sleeves and ending at the dress hemline, and serged the edges. I serged the hemline and the sleeve opening edge as well.
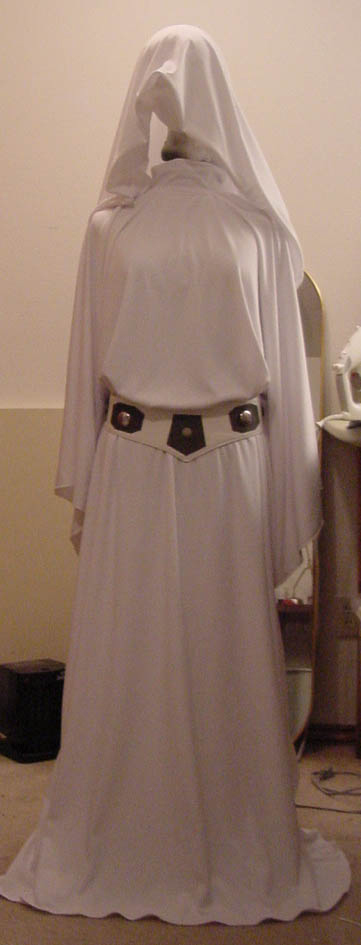
Pictures and diagrams at www.padawansguide.com showed that the hood was really just a long strip of fabric gathered at each end and attached to the collar on either side of the center back zipper. I used about a yard of the full-width fabric and hand pleated the selvage edges into 4.5 ¢ 5ö final widths, basting the pleats down. If I were to do it again, I would make it less than 60ö long, as it turned out to be a very long hood. I cut a short (4 ¢ 6ö) slit down the center back of the dress for a zipper. The collar was a strip of material cut so the stretchy way went horizontally around the neck. Length equal to the neck circumference plus 1ö or so for seam allowance, width about 6ö, then folded to make a double layer 3ö high collar. The pleated ends of the hood fabric were pinned to either side of the center back slit, about a Į ō from the edge, on the right side of the fabric. Then the collar piece was layered over that and all edges stitched together. I put in the zipper down the center back.
After playing with the hood drape, I decided I didnÆt like it as just a hanging ōUö of fabric, so I stitched two long edges together ¢ the ones that hung closest to the zipper and closest to the dress fabric ¢ from the bottom of the ōUö to just below the bottom of the zipper.
Then, on to the belt! I followed the basic directions from http://www.jedi-academy.com/leia_anh_belt.html to make it, with some modifications. Instead of heavy 5 ¢ 6 oz leather, I used two layers of white vinyl. To the outside layer, I first sewed on shapes cut from grey vinyl (instead of metal), stitching very close to the edge of each piece. The buttons were all scavenged from my stash, and I didnÆt have enough really big ones, so I mixed and matched the best I could. The center front button had a big old shank on it that I couldnÆt bend, so I punched a small hole through the outer belt layer, threaded a tiny safety pin through the shank and sealed it down with a layer of duct tape. I then attached the inner layer of the vinyl, again stitching very close to the outer edges all around the beltÆs perimeter. I hotglued the remaining buttons in the center of each grey motif.
![]() Back to Princess Leia Costume Main Page
Back to Princess Leia Costume Main Page