Aragorn's Royal Armor
Costume Detail
Here’s how I put together the costume pictured.
Some slight changes will be made to future versions – it was a good
learning experience!
This costume has many layers. Underneath it all, he wears what I believe is the same red
linen shirt from Two Towers (or something very similar), and presumably, the
same pants. His boots are more
rigid than his ranger boots, with a slight heel.
Over the red shirt (which I padded significantly at the
shoulders with several layers of batting), he wears a chain mail shirt and
skirt. We had not seen the Weapons
and Warfare book when we commissioned the chain mail, and so we used, instead, a
hauberk with ľ length sleeves, that goes to mid shin. HEAVY….
Over the chain mail, he wears a ruby red velvet surcoat
with gold trim on the collar and down the front edges. I used heavy acetate velvet from JoAnn’s Fabrics for this
surcoat. 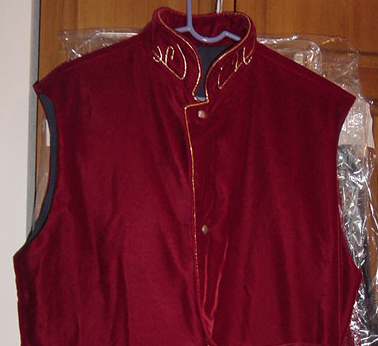 The pile was so heavy, it almost locked together as I stitched,
making it the most worry-free velvet sewing I have ever done.
I would gladly pay the $19 a yard again to repeat that experience!
For a pattern, I used a simple square shirt pattern, heavily modified.
I did not use the sleeves, made the armholes bigger and the whole thing
longer. All of this was done FIRST
with a muslin, and fitted over the chainmaille.
I faked the mandarin collar with muslin until I got a shape I liked.
I could not find an exact match for the buttons, so I used some round
silver ones with a geometric pattern in the middle that I had on hand.
The pile was so heavy, it almost locked together as I stitched,
making it the most worry-free velvet sewing I have ever done.
I would gladly pay the $19 a yard again to repeat that experience!
For a pattern, I used a simple square shirt pattern, heavily modified.
I did not use the sleeves, made the armholes bigger and the whole thing
longer. All of this was done FIRST
with a muslin, and fitted over the chainmaille.
I faked the mandarin collar with muslin until I got a shape I liked.
I could not find an exact match for the buttons, so I used some round
silver ones with a geometric pattern in the middle that I had on hand. 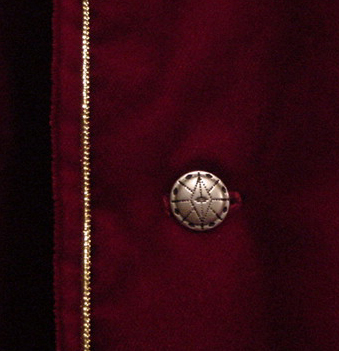 I trimmed the front edges with gold soutache:
I used clear (sometimes called “invisible”) thread to zigzag over the
trim to secure it to the garment. The
design on the collar I stitched first in red thread to match the fabric, then
used the clear thread again to zigzag over the trim, following the stitching
lines.
I trimmed the front edges with gold soutache:
I used clear (sometimes called “invisible”) thread to zigzag over the
trim to secure it to the garment. The
design on the collar I stitched first in red thread to match the fabric, then
used the clear thread again to zigzag over the trim, following the stitching
lines. 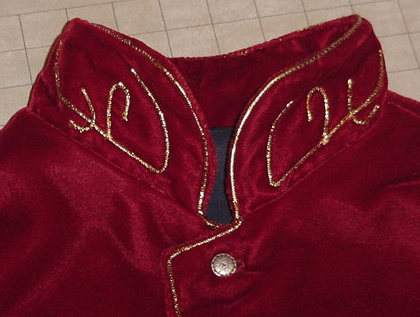 I
did this part BEFORE attaching it to the coat. After everything was together, I lined the surcoat with
navy blue cotton, to hide the seams and give it more finished look.
I
did this part BEFORE attaching it to the coat. After everything was together, I lined the surcoat with
navy blue cotton, to hide the seams and give it more finished look.
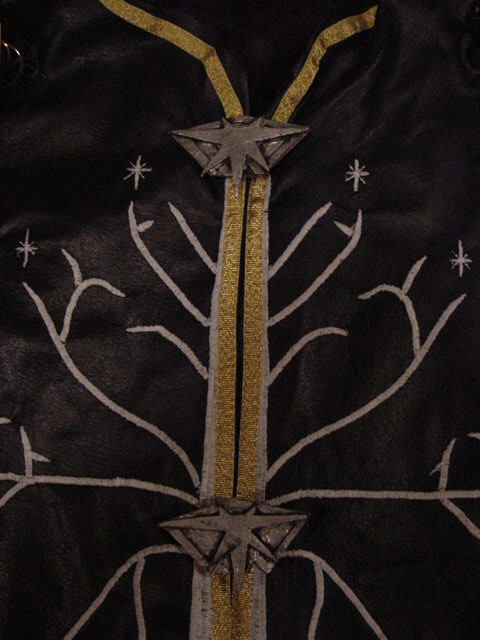
Over the red velvet, he wears a leather surcoat.
It looks black in some lights and blue on the action figure – so I
ordered a dark navy blue leather (halfhide) from www.hidehouse.com
in California. This piece was BARELY big enough, so I recommend if your
Aragorn is more than 5’7” and 140lbs, you get a full hide! Again, I made a muslin first (based on the same pattern as I
modified for the velvet). I made
sure it fit correctly, AND made sure the white tree pattern I had drawn was the
right scale. We used the few
pictures we could find, plus the action figure, to adjust the scale.
The bottom of the tree is right about waist level and the outermost stars
are still on the flat front part of the chest, not bent around the sides.
The top of the tree is just under the collar opening.
Once the muslin was approved, I took it apart and laid out all the pieces
on my leather. As luck would have
it, there was a hole in a very inconvenient spot and the only way I could work
around it was to put it exactly in the middle of the upper back.
I covered it up with a leather patch that I embroidered with the same
feather motif as on his rerebraces. Before
assembling the surcoat, I drew one half of the white tree to scale on stabilizer
paper, traced its mirror image on another piece of stablilizer and taped these
to the wrong side of the front leather pieces where appropriate.
IMPORTANT: Be sure to leave
several inches of unembroidered space along the center front.
You will need to turn under the edges and create a placket for snaps for
the front closure! One side will have to overlap the other – they do not meet
exactly at center front.
I then used a very dense machine zigzag stitch all along
the drawing lines. It took a long
time, but I needed to go slowly so that the leather didn’t stretch and the
stitches stayed evenly thick. After
the embroidery was done, I sewed the fronts to the back at the shoulders and at
the side seams, from underarm to waist. From
waist to hem, I folded under ˝” or so on each side, and stitched it down to
finish the edges. I used an antique
gold metallic grosgrain ribbon (3/8” wide) to trim the armholes and front
edges/collar. I straight-stitched
along both edges of the ribbon to hold it down firmly, using the same clear
thread as I used on the red velvet trim. 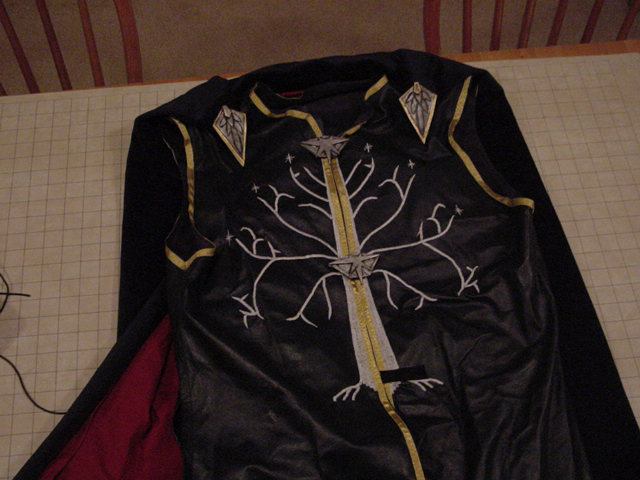
The cloak was just a rectangle of dark blue upholstery
velvet *slightly* narrower at the
top than at the bottom, lined with dark red cotton.
Now starts the really tricky part, and you’ll have to
refer to my photos to really understand….
- Attaching
the cloak to the leather surcoat was the hardest part of the whole deal.
I scrunched up the two upper corners and sort of wadded those corners
into triangle shapes that I hand stitched together on the wrong side (the
red side). To this “wad”, I
hand stitched the ring of a
clip like one would find on the end of a dog leash (well, a small dog
leash – mine I cannibalized from an old purse). I also firmly stitched part of the hook mechanism to the
underside of the wad, but not so tightly that I couldn’t still use it to
attach to something. On the leather surcoat, I attached D-ring
on a loop at midshoulder, a few inches down on to the chest.
Then I could hook the cloak’s wadded corners to that ring on the leather. Additionally, I had to use a giant
safety pin on each shoulder seam to support the weight of the cloak.
Over this mess, I glued a “cloak
clasp” made of craft foam which mostly hid the attachment.
- The
cloak clasps were two layers of craft foam, hotglued together and coated
with ScupltOrCoat (www.rosebrand.com)
so that they would take paint. For
all the “metal” parts I used the American Accent Antique Pewter paint
kit. The clasps had a line of
gold around the edge and I just handpainted the lines with Plaid antique
gold paint from JoAnn’s.
- The
clasps up the front of the leather surcoat I made from Craft Foam.
I cut out a bottom layer and carefully cut a thin outline from a
second layer the same size and shape, THEN cut out a star shape and glued
these three layers together. The
foam was coated with SculptOrCoat before painting.
 Now, these weren’t tough enough to actually bear any weight, that’s why
I used snaps up the front as a true closure.
To the clasps, I glued a strip of bias tape that had snaps sewn on
it. The bias tape was also sewn
to the right front of the coat. Another piece of bias tape with the other
half of the snaps was sewn to the left front of the coat.
[Click here and here
for more photos.] These overlapped and snapped together to give the
illusion that the clasps were holding the front closed.
Now, these weren’t tough enough to actually bear any weight, that’s why
I used snaps up the front as a true closure.
To the clasps, I glued a strip of bias tape that had snaps sewn on
it. The bias tape was also sewn
to the right front of the coat. Another piece of bias tape with the other
half of the snaps was sewn to the left front of the coat.
[Click here and here
for more photos.] These overlapped and snapped together to give the
illusion that the clasps were holding the front closed.
- I
made greaves and boot plates from cardboard covered with a layer of Gapoxio.
I secured metal rings at key places (sides of greaves and sides of
boot plates, up near the ankle) so I could tie them on with cording.
 Good idea that didn’t work so well in practice. The boot plates, in particular, slid around a lot
because we couldn’t get them tight enough to stay.
More work to be done on that…
The greaves went over a “leather” layer that buckled around the
boot. My sewing machine can’t
handle leather much thicker than 2 oz, so I covered thick craft foam with a
layer of garment weight leather and stitched around the edges, about Ľ”
away from the edge, to simulate heavier grade leather.
Good idea that didn’t work so well in practice. The boot plates, in particular, slid around a lot
because we couldn’t get them tight enough to stay.
More work to be done on that…
The greaves went over a “leather” layer that buckled around the
boot. My sewing machine can’t
handle leather much thicker than 2 oz, so I covered thick craft foam with a
layer of garment weight leather and stitched around the edges, about Ľ”
away from the edge, to simulate heavier grade leather.
- We
used Boromir’s bracers (from www.Kropserkel.com
) because I had no time to make new ones and hardly anyone would notice the
difference (especially at the Line Party, where most of them hadn’t seen
any detailed pics yet…). A side note: Kropserkel rocks!
Do business with them!!
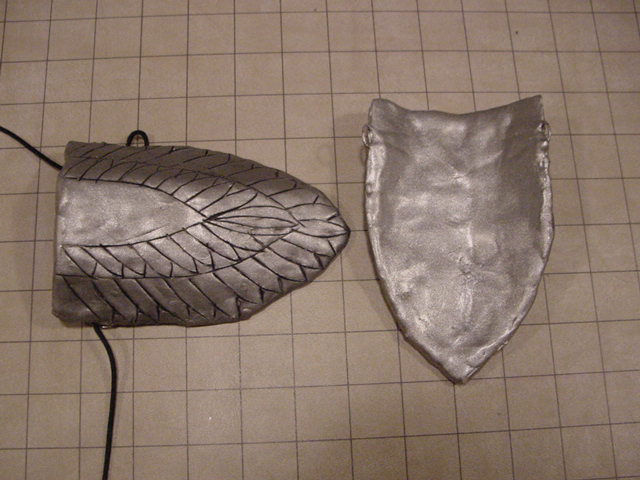
- The
shoulder armor (sorry I don’t know the right technical terms) was made in
two pieces. The upper piece I
call a pauldron. The lower
piece I just call the lower piece for lack of armor vocabulary.
The lower piece is two layers of leather and one layer of metal.
 The leather layers were made just like the shin guard pieces: craft foam covered in garment weight leather.
The bottom layer is shaped kind of like a coat of arms shield, the
second layer is the same shape, only slightly smaller, and has two
“branches” that go around the arm and presumably buckle there.
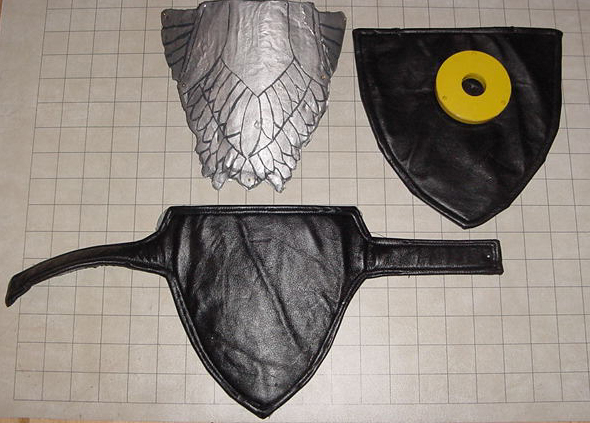
I just used a leather punch to make a hole in each end and used a
ziptie to secure the ends together. The
uppermost layer is “metal” (cardboard covered with a thin layer of
Gapoxio) and painted as described above.
These three layers were glued together with hotglue and later (mid
Line party) were reinforced with duct tape, which held together much more
strongly…
The leather layers were made just like the shin guard pieces: craft foam covered in garment weight leather.
The bottom layer is shaped kind of like a coat of arms shield, the
second layer is the same shape, only slightly smaller, and has two
“branches” that go around the arm and presumably buckle there.
I just used a leather punch to make a hole in each end and used a
ziptie to secure the ends together. The
uppermost layer is “metal” (cardboard covered with a thin layer of
Gapoxio) and painted as described above.
These three layers were glued together with hotglue and later (mid
Line party) were reinforced with duct tape, which held together much more
strongly…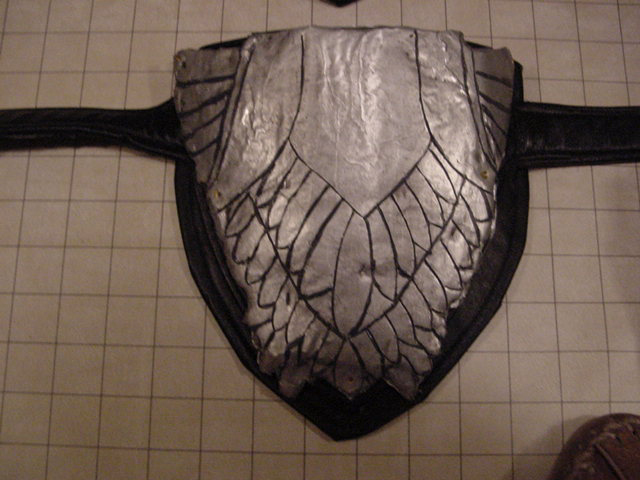 Zipties
were inserted through holes in the leather layers along the top edge and
looped through the chain mail to hold this part in place.
Zipties
were inserted through holes in the leather layers along the top edge and
looped through the chain mail to hold this part in place.
- The
“pauldrons” were made from cardboard, craft foam and a thin layer of
Gapoxio. The pictures of
the individual pieces were taken on a one-inch grid so you can get an idea
of scale. There are three squarish layers of “metal” and two
“shield” sort of shapes that intercalate between the first /second, and
second/third metal layers.
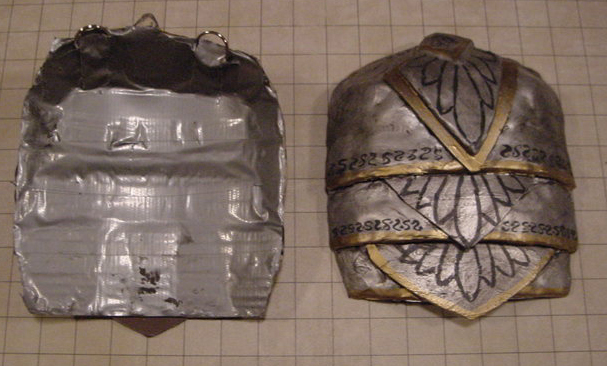 The “shield” shapes were made of craft foam, so I could bend them
up out of the way as I coated the cardboard with Gapoxio. The craft foam had to be treated with ScupltOrCoat
before painting. The cardboard
pieces are all held together from underneath with duct tape.
The hardest part is the uppermost “square” as it has to contour
to the shoulder. I did it by trial and error, and hope to have pictures
of the individual pieces up soon. Just
experiment with the tape and folding bits together.
The “shield” shapes were made of craft foam, so I could bend them
up out of the way as I coated the cardboard with Gapoxio. The craft foam had to be treated with ScupltOrCoat
before painting. The cardboard
pieces are all held together from underneath with duct tape.
The hardest part is the uppermost “square” as it has to contour
to the shoulder. I did it by trial and error, and hope to have pictures
of the individual pieces up soon. Just
experiment with the tape and folding bits together.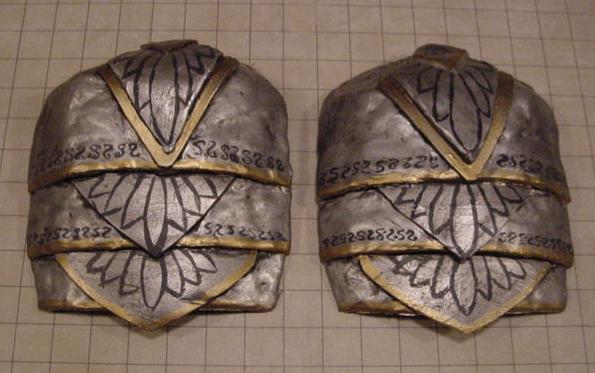 The whole thing looks really ugly until you get the Gapoxio layer on
there! The upper edges of the
pauldrons had D-rings attached on the underside, and I again used zipties to
attach the pauldrons to the chainmail.
The red surcoat and the leather surcoat cover up the zipties quite
nicely.
The whole thing looks really ugly until you get the Gapoxio layer on
there! The upper edges of the
pauldrons had D-rings attached on the underside, and I again used zipties to
attach the pauldrons to the chainmail.
The red surcoat and the leather surcoat cover up the zipties quite
nicely.

 Back to Aragorn's Royal Armor Costume Main Page
Home |
Costumes |
Ordering |
Contact Us